How to Create a Google Form™ Attendance System?

Tracking attendance effectively is crucial for teachers, professors, course instructors, and event organizers. Google Forms™ offers a simple solution that streamlines the process, making it easy and efficient.
This blog post will help you make a Google Form to track attendance.
Understanding Google Forms
Google Forms ™ is a free tool. You can use it to create forms, surveys, and quizzes. It is helpful for taking attendance.
You can create Google Forms™ without programming skills—just a Google account is sufficient to get started.
Let’s get started. Here is your step-by-step guide to creating a Google Form for attendance tracking.
How to Create a Google Form
Step 1: Setting Up Your Google Forms™
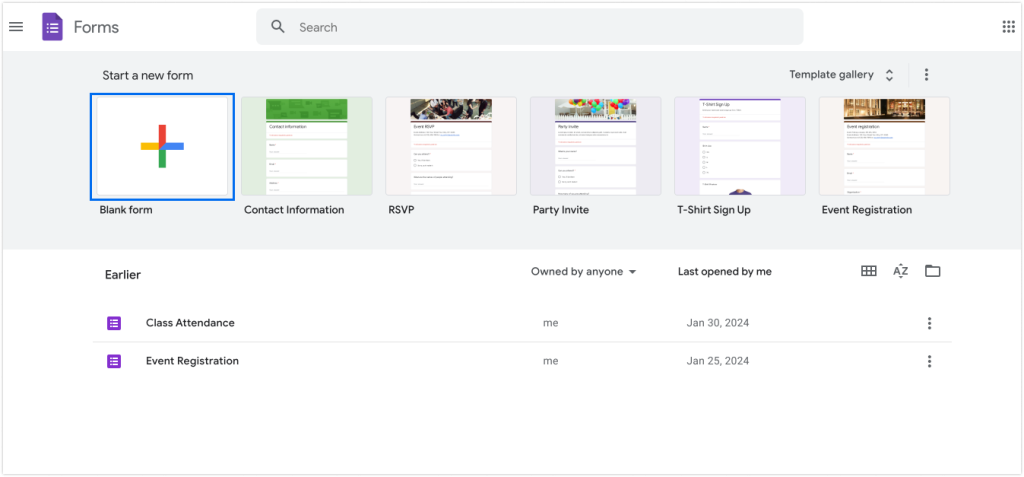
To start, visit Google Forms™ and sign in with your Google account. You can access it directly or through Google Drive.
Step 2: Creating Your Form
- Select a Template or Start Fresh: Google Forms™ offers a range of templates that can be modified to suit your needs. Starting with a blank form is often best for a custom attendance system.
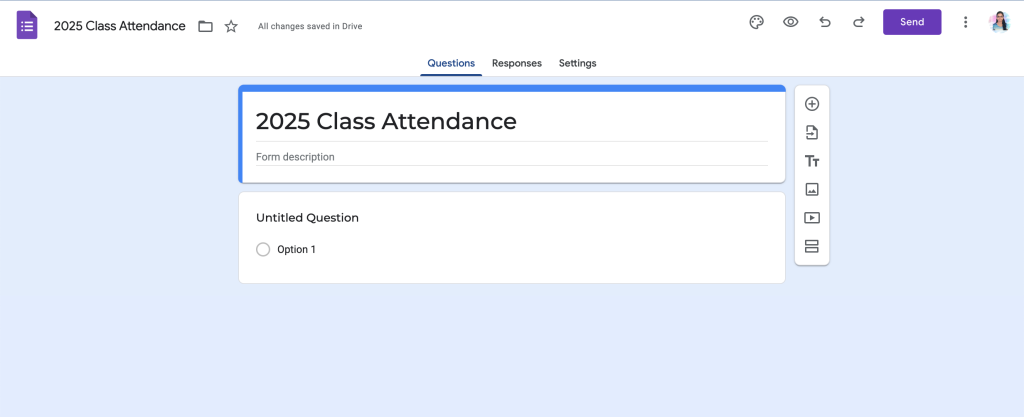
- Name Your Form: Choose a clear title that clearly says what the form is for. Examples include “2025 Class Attendance” or “Annual Tech Conference Attendance.”
Step 3: Adding Attendance-Specific Questions
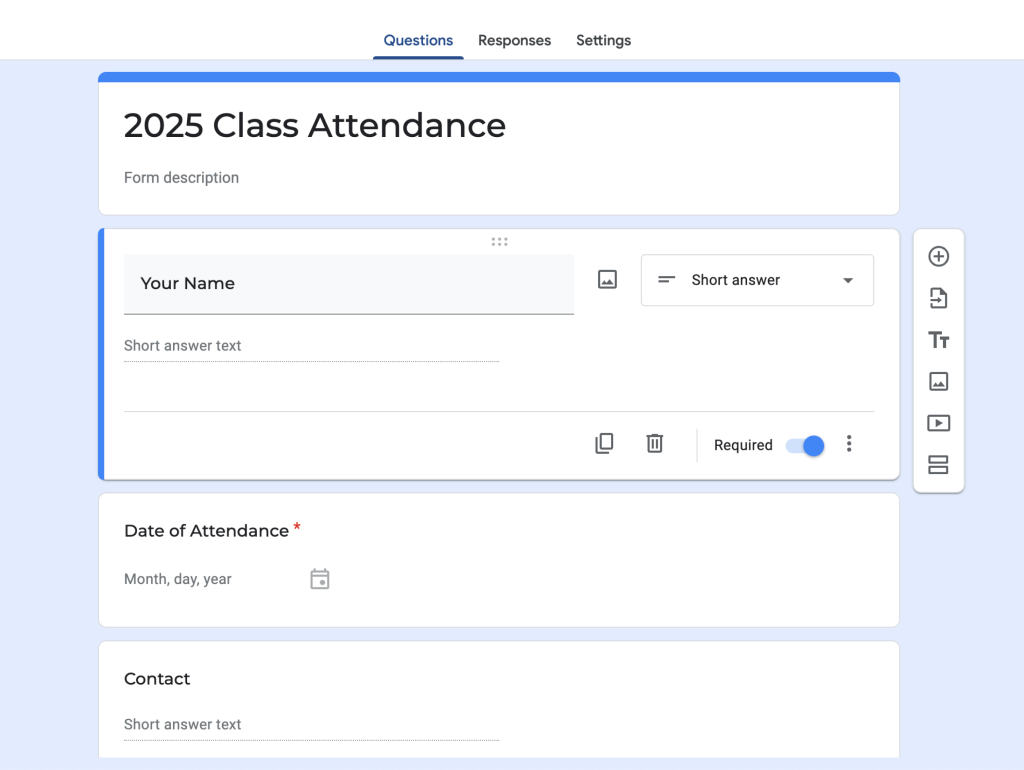
- Student/Participant Information: Common fields include name, date of attendance, and contact information. Use the ‘Short answer’ option for names and the ‘Date’ picker for session dates.
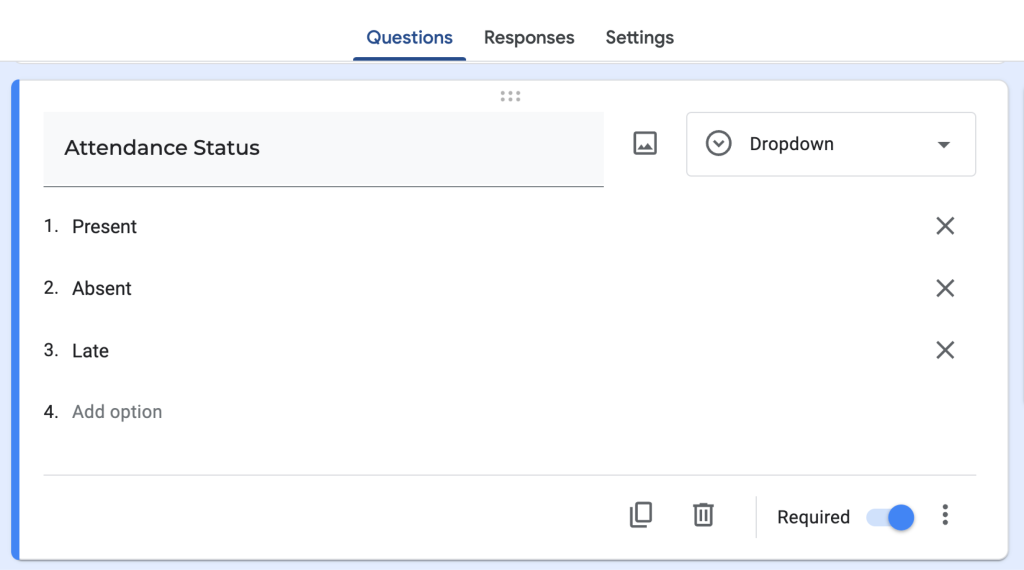
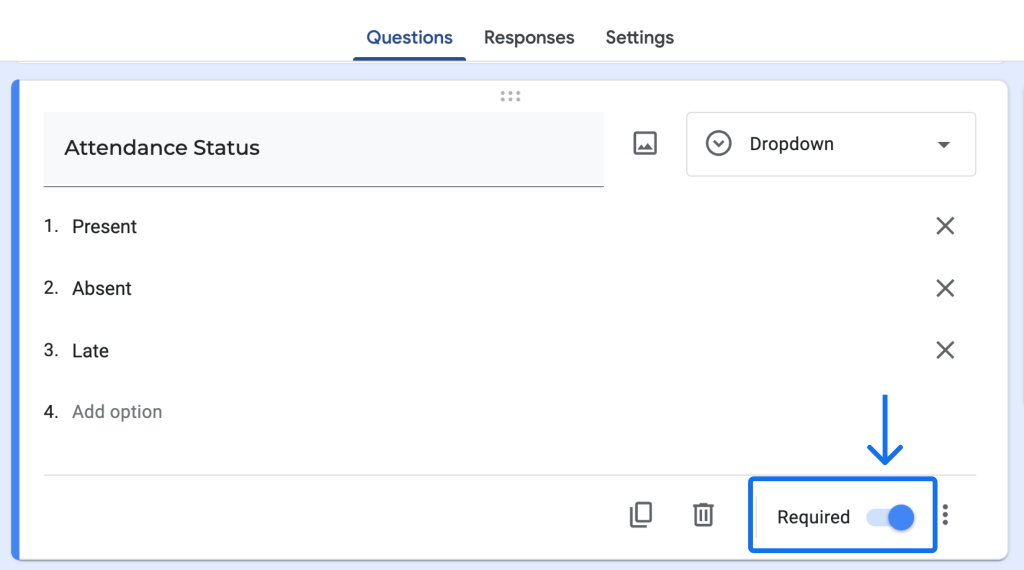
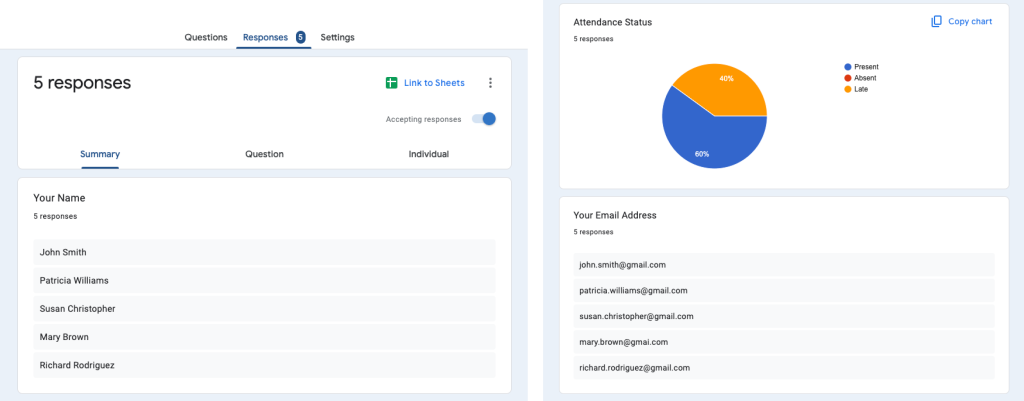
- Custom Questions: Depending on what you need, you could add custom questions such as “Attendance Status” with drop-down menus. This could include options like “Present,” “Absent,” or “Late” to make responses consistent.
Step 4: Making Questions Mandatory
Make sure all important questions are set as required. This helps make sure participants fill in all important fields. This way, we can collect accurate data.
Step 5: Enhancing Form Usability
- Organizing Your Form: For long forms, break them into sections to show different types of information. This keeps the form organized and user-friendly.

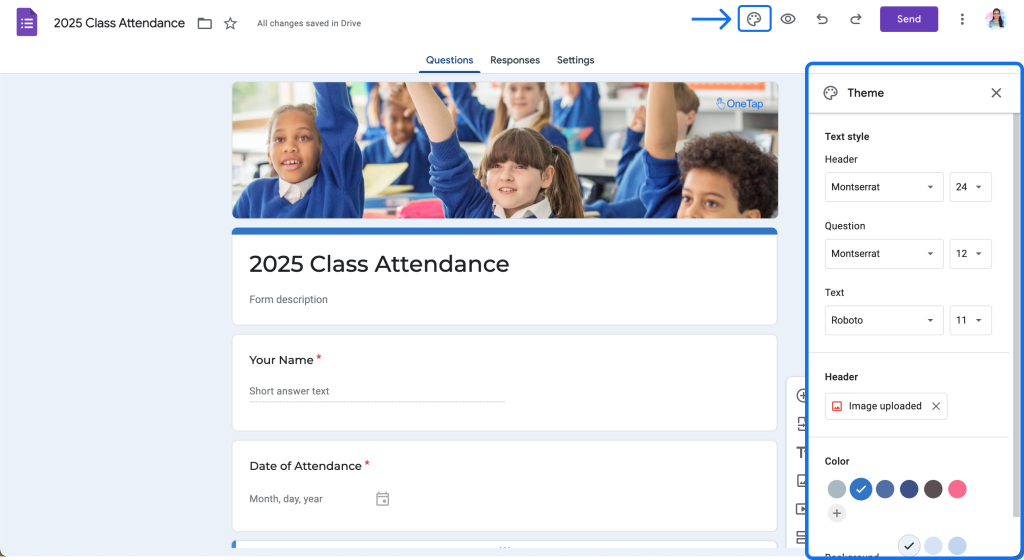
- Customizing the Look: Customize the form’s theme to match your institution or event branding. This can be done by clicking on the palette icon in the upper right corner.
Step 6: Distributing the Form
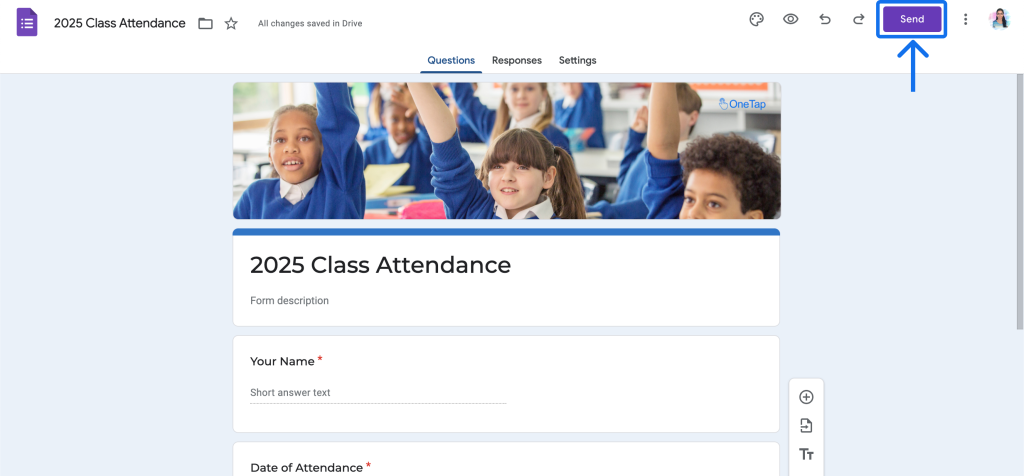
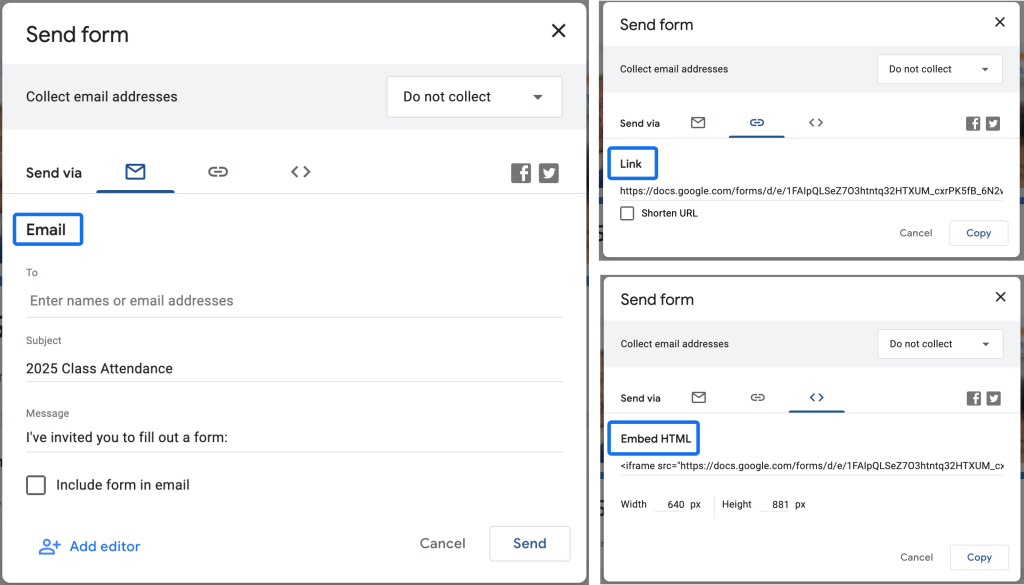
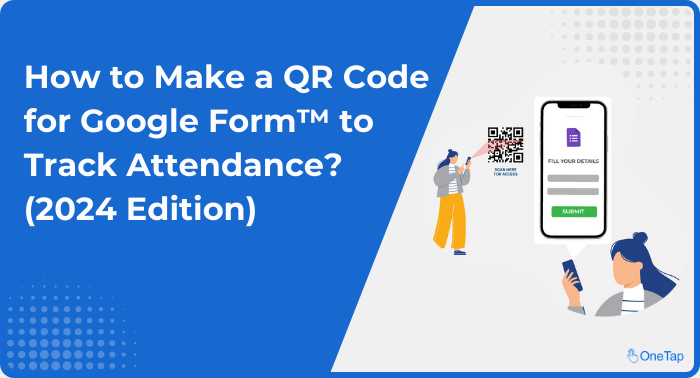
- Sharing Options: Google Forms™ allows sharing through a direct link, by email, or by embedding it on a website. For events, consider displaying a QR code at the entrance, which links directly to the form.
For events, consider displaying a QR code at the entrance, which links directly to the form.
Discover How to create a Google Form QR code.
- Collecting Responses: Make a form to gather email addresses for follow-ups if needed.
P.S. We have a free resource for you! Explore our selection of Google Forms™ templates to find out more.
Step 7: Analyzing Attendance Data
- Viewing Responses: You can see responses directly in Google Forms or connect them to a Google Sheet for more detailed analysis.
- Attendance Reports: Use Google Sheets to create detailed reports, monitor attendance trends, or identify attendance patterns.
Tips for Advanced Features
Automated Reminders: Use Google Calendar to send automated reminders to fill out the form.
Add-ons: Check out add-ons like ‘Form Approvals’ or ‘Form Notifications’ to improve your Google Forms experience.
Conclusion
Making an attendance system with Google Forms™ is easy and flexible. By using these steps, teachers and event planners can easily keep track of who is coming.
The OneTap Attendance App helps you track attendance for a large group of students or guests. It is 10X faster and has special features to make attendance easier.
Discover more benefits of OneTap attendance vs. Google Forms™.
Ready to Simplify Classroom Attendance?
If you love how Google Forms™ keeps you organized, you will find OneTap impressive. A simple, secure, and fast classroom attendance app with instant reports and advanced analytics – all in one app.
